How to fix your incorrect DNS problems
Requirements
- You have modified your DNS settings on your console
- You have checked wzconsole.com on your console
- But your still have an error which says: "Your DNS settings are incorrect"
Follow these steps to easily fix the incorrect DNS settings.
1. Verify your current setup
Check your configuration (wzconsole.com) directly on your console, not on a phone or laptop
Please double-check that your entered 152.228.133.244
2. Modify DNS settings on your router
It is possible that your router has its own DNS settings or is overriding the console's settings
Access the router interface by entering 192.168.1.1 or 192.168.0.1 or 192.168.2.1.
If none of these work, check the sticker on your router for the correct address.
Check your router’s sticker for default login credentials. They are usually ’admin’, or ’user’ or the name of the router.
1. Go to a section like ’Network Settings’, ’Advanced Settings’, ’WAN Setup’, ’LAN Setup’, or something similar.
2. Within this section, you should find the DNS settings. This might be under a subsection like ’Internet Settings’, ’DHCP Settings’, or directly labeled as ’DNS Settings’.
1. Select Manual for DNS Configuration, or No for Connect to DNS Server automatically (or similar settings)
2. Input these IPv4 DNS settings:
- DNS Server 1 (Primary): 152.228.133.244
- DNS Server 2 (Secondary): 1.1.1.1
3. If possible, disable IPv6
Restart your console and visit the wzconsole.com page to confirm the settings are working
Follow our router guides to modify the DNS
Modify DNS settings on your Vodafone router
1. Access the router interface by entering http://192.168.1.1/ in your browser while connected to your Vodafone Home Broadband.
2. Log in using the default password: vodafone
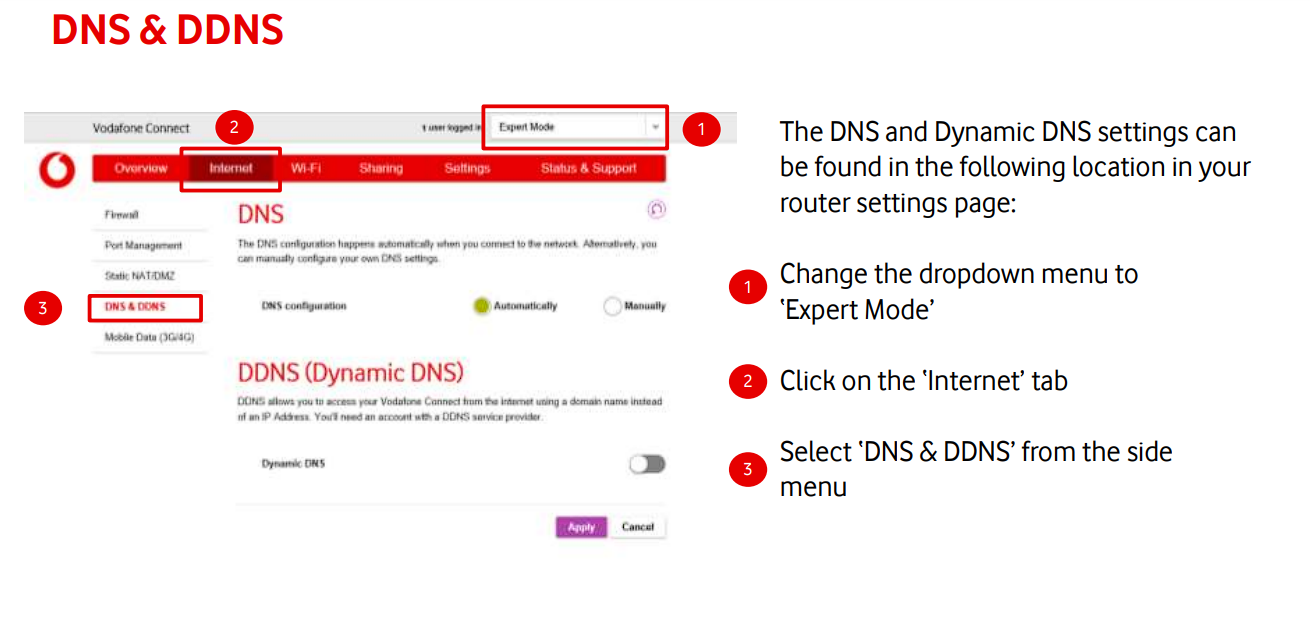
Screenshot from the Vodafone guide
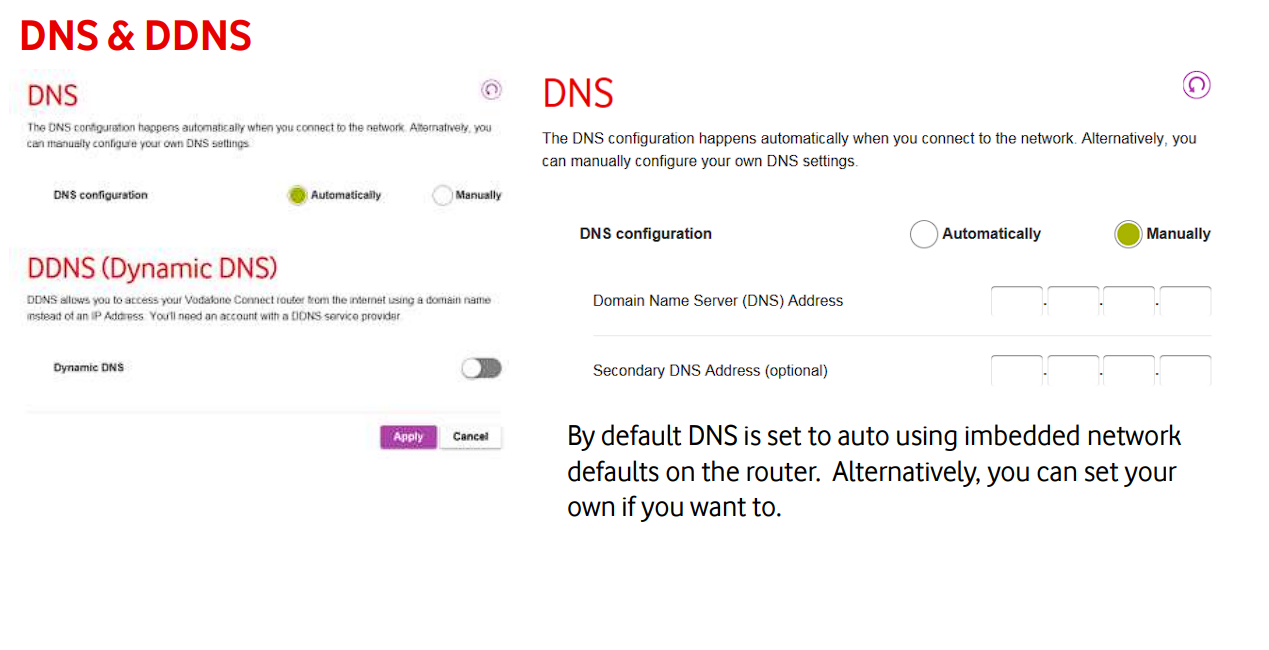
Screenshot from the Vodafone guide
1. Change "DNS configuration" to "Manual"
2. Input these IPv4 DNS settings:
- Domain Name Server (DNS) Address: 152.228.133.244
- Secondary DNS Address (optional): 1.1.1.1
3. If possible, disable IPv6
Restart your console and visit the wzconsole.com page to confirm the settings are working
Modify DNS settings on your Asus router
1. Access the router interface by entering 192.168.1.1 or 192.168.0.1 or 192.168.2.1.
If none of these work, check the sticker on your router for the correct address.
1. Check your router’s sticker for default login credentials, unless you have changed them.
1. On the left-hand side scroll down to WAN and select it.
2. Scroll down to WAN DNS Setting.
1. Select No for Connect to DNS Server automatically.
2. Input these IPv4 DNS settings:
- DNS Server 1 (Primary): 152.228.133.244
- DNS Server 2 (Secondary): 1.1.1.1
3. If possible, disable IPv6
Restart your console and visit the wzconsole.com page to confirm the settings are working
Modify DNS settings on your Linksys router
1. Access the router interface by entering 192.168.1.1 or 192.168.0.1 or 192.168.2.1.
If none of these work, check the sticker on your router for the correct address.
Check your router’s sticker for default login credentials, unless you have changed them.
Choose Basic Setup
1. Make sure Enable DHCP is selected
2. Input these IPv4 DNS settings:
- Preferred DNS (Primary): 152.228.133.244
- Secondary DNS: 1.1.1.1
3. If possible, disable IPv6
Restart your console and visit the wzconsole.com page to confirm the settings are working
Modify DNS settings on your DD-WRT router
Access the router interface by entering 192.168.1.1 or 192.168.0.1 or 192.168.2.1.
If none of these work, check the sticker on your router for the correct address.
Check your router’s sticker for default login credentials, unless you have changed them.
Go to Setup -> Basic Setup -> Network Setup -> Network Address Server Settings (DHCP)
1. Input these IPv4 DNS settings:
- Preferred DNS (Primary): 152.228.133.244
- Secondary DNS: 1.1.1.1
2. If possible, disable IPv6
3. Go to Services -> Services -> Services Management -> DNSMasq -> Additional DNSMasq Options and enter the following command into the text box: -strict-order
Restart your console and visit the wzconsole.com page to confirm the settings are working
3. Still having trouble? Contact us
Open contact form